DIY Brass Chandelier
Do you say "Yes, please!" to mod brass lighting fixtures that you can make yourself and customize to your own space? Or maybe you're of the train of thought where DIY lighting fixtures seem overwhelming and intimidating and scary.
 View in gallery
 Either way, you may have seen the Lindsey Adelman contumely chandelier that has graced cyberspace for a couple of years at present, non but because it'south a beauty, only also because it comes in a DIY kit. Which is very convenient, although information technology's non the route we took. This step-past-step tutorial you're reading right at present aims to accept you through the procedure of edifice the brass chandelier in as simple a way every bit possible, while keeping the entire process completely customized. Let'due south dive in.
 View in gallery
 Notation: Author is an experienced, although not professional, electrician. The chandelier-building procedure is explained as clearly and accurately as possible. Contact a professional with whatsoever questions or potential hazards you come beyond. Homedit is not responsible for any damage caused as a event of following this tutorial.
DIY Level: Intermediate to Advanced.
 View in gallery
 Materials Needed for Exact Lamp in Tutorial: (Notation: Photograph shown is a loose guide; employ the text below for authentic materials list.)GrandBrass.com:
- 1 x FI1/8PLUG (i/8 plug with screw driver slot)
- 1 x RE1/8FX1/4MS (1/8f ten 1/4m reducer w/ shoulder brass)
- 2 10 NI0-1/2X1/8 (1/2in x 1/8 ips nipple steel)
- 2 10 BOT2 (i/8f bottom x (2)1/8f top tapered brass cluster body)
- 5 x CU578 (2-1/4in cup west/ ane/8sl hole brass raw)
- v x SR0-3/8 (3/8in slip ring w/ side spiral brass)
- v x SO10045 (Edison porcelain keyless socket 660w-250v i/eight-27 cap)
- 1 ten NE449NP (nickel plated i/8f thru 10 5/8in straight coupling)
- three x SV140 (1/8f ten 1/8f ips adjustable friction swivel brass)
- 1 x BOLG3 ((3)1/8f sides 10 i/4f lesser ten 1/8f top large cluster body unfinished brass)
- 1 ten PIBR07-0x8 (7in x 1/8 ips brass pipage stem)
- 3 x PIBR06-0x8 (6in x 1/8 ips brass pipe stem)
- 1 ten PIBR05-0x8 (5in x 1/8 ips brass pipe stem)
- 2 x PIBR04-0x8 (4in 10 ane/8 ips contumely piping stem)
- 3 x PIBR03-0x8 (3in x 1/8 ips brass pipage stem)
- Amazon.com: ane x Leviton 128-I 15-Amp 660-Watt Twin Light-Socket Adapter – Ivory
- Etsy.com (SnakeHeadVintage store): 1 x Ceiling Canopy Wall Sconce Mount – Polished Satin Brass
- Hardware Store:
- x' x 18AWG white wire
- 10' x 18 AWG black wire
- ii x wire nuts (medium-sized)
- SuperBrightLEDs.com: six x E27-A19DF-WW4 Warm White bulbs
 View in gallery
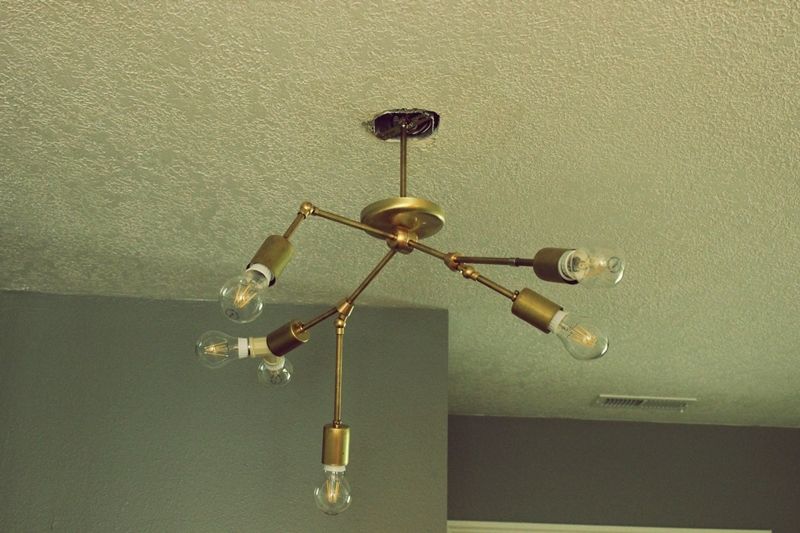
 Pace 1: Sketch or find a picture of what y'all desire your concluding chandelier to expect like. Consider your infinite – is it long and narrow (such as over a dining table) or more than square (such equally in an entryway)? This tutorial shows a brass chandelier that fits into a space that is more foursquare than long, so information technology has three primary branches. (Lindsey Adelman'south has 2.)
 View in gallery
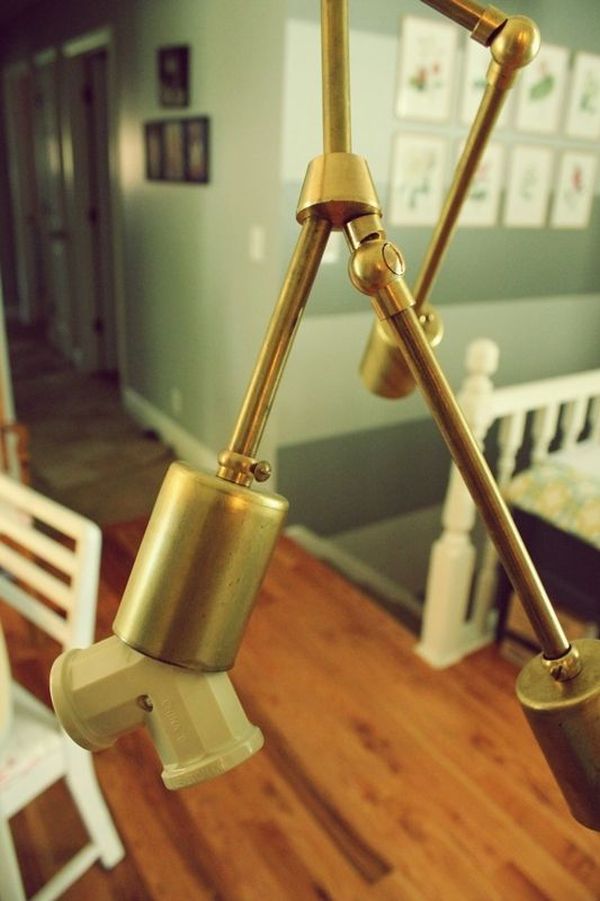
 Stride two: Loosely configure your chandelier. Using the sketch/photo every bit your guide, loosely begin to configure your chandelier without the wire. Have fun with this! The full general ideas is: the porcelain socket goes within the contumely cup, the piping screws into the socket, and the skid ring goes over the pipe next to the brass cup. (Note: The photo shown above is a two-branch beta version of the chandelier, not the final chandelier.)
 View in gallery
 Tip: Take detailed photos of your configuration as you get. You volition disassemble this entire thing subsequently, so you'll desire to apply photos to guide you.
 View in gallery
 Pace three: Fix the ceiling fixture. First, make certain to flip the breaker and so the electrical is off, and then remove old chandelier, if necessary, and brand certain the ceiling mountain is secure. We had to make a few trips to the attic to secure the mountain ameliorate so the lamp would hang directly.
 View in gallery
 Step four: Do a mock-up attachment of the chandelier to the ceiling. Make sure all systems are go with ceiling attachment and that you like the look and experience of your chandelier configuration in your infinite. (Note: Again, this is the beta version of our chandelier; although we liked the two-branch version, information technology but wasn't right for our infinite. Plus, it's trickier to wire.)
 View in gallery
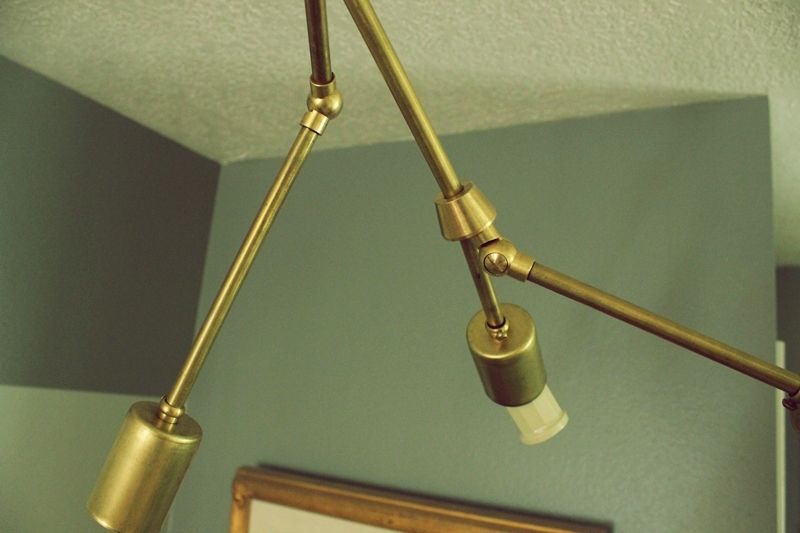
 Tip: Play with the angles of the branches.
 View in gallery
 Tip: Gently and slowly spin the chandelier to align information technology how you want it in your space.
 View in gallery
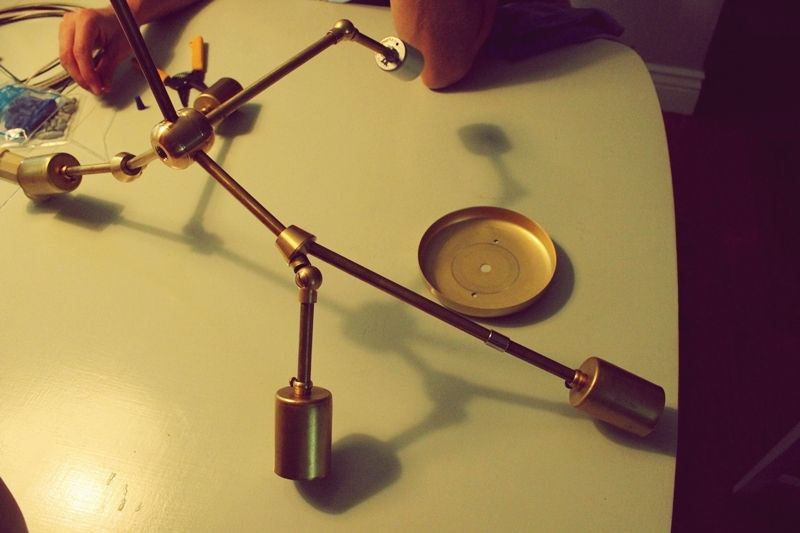
 Step 5: Remove chandelier from ceiling and make any configuration changes necessary. This stride is optional. The photo above shows how part of our second co-operative was removed and attached to the central hub (large cluster body) to form a third branch. This created a more three-dimensional shape, which fit our square space.
 View in gallery
 Step vi: Disassemble main branches from central hub.
 View in gallery
 Stride 7: Wire up ane co-operative at a time.
 View in gallery
 Stride 7a: Using wire cutters, advisedly cut through wire casing (non the wire) most ane" from the end.
 View in gallery
 Step 7b: Pull the i" section of wire casing off the wire.
 View in gallery
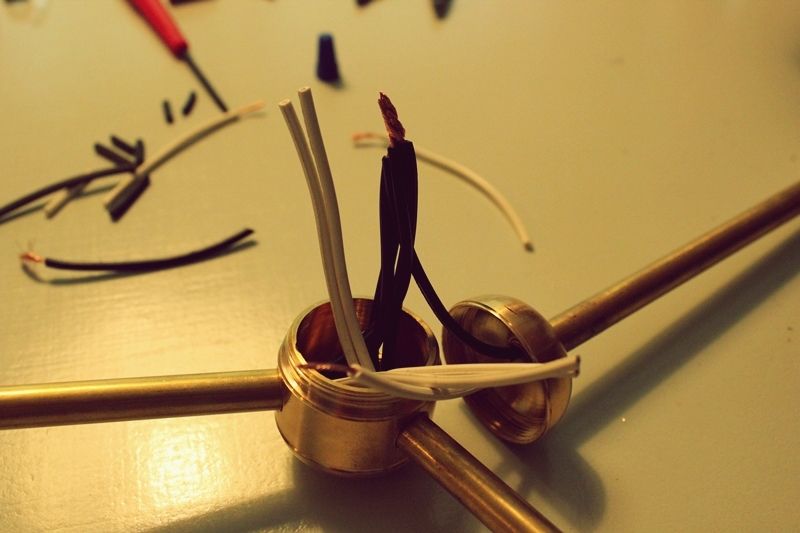
 Footstep 7c: Create a hook with the exposed wire and adhere to the respective screw on the porcelain socket. Do this for both the black and white wires. (Blackness to Gilded, WHITE to SILVER.)
 View in gallery
 Step 7d: Working backwards, thread the wire through other elements on that co-operative.
 View in gallery
 Step 7e: Put everything together and tighten. This will be your final tightening, then make certain parts are straight and secure.
 View in gallery
 Tip: Take the "elbow" pieces (adjustable swivels) apart when wiring, and so carefully reattch them when wires are in place, as shown in photos above and beneath.
 View in gallery
  View in gallery
 Footstep 7f: When branch is completed to a junction or the central hub, cut wire while leaving about 3" sticking out.
 View in gallery
 Step 8: Wire upwardly all branches this style up to the central hub.
 View in gallery
 Tip: If yous followed this tutorial's three-branch configuration, when you're done wiring the branches, you lot should accept v white and five blackness wires coming out of the central hub. (Annotation: Although at that place are six lite bulbs, the twin light socket adapter is wired as though it were just one bulb.)
 View in gallery
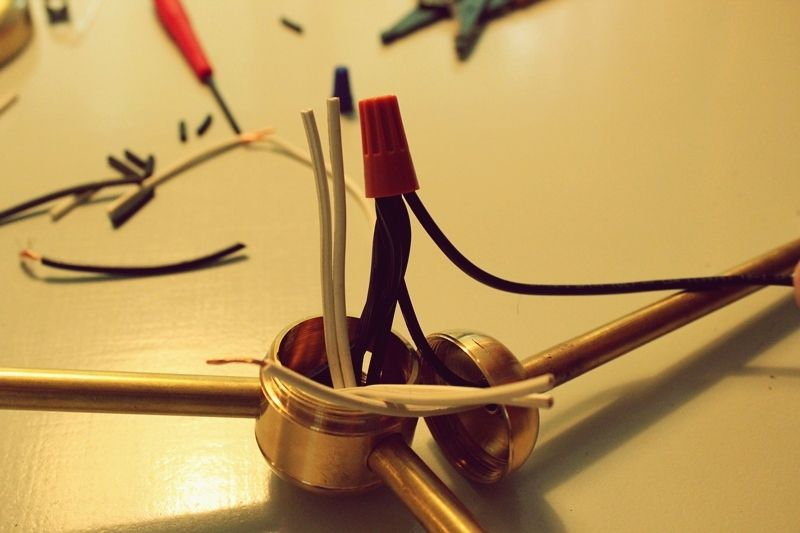
 Footstep 9: Remove black wire casing ends and twist wires together. The goal here is to accept all the branches' black wires come together and connect to a unmarried black wire to send up through the vertical pipe that connects to the ceiling wires (nosotros'll do the same for white wires later). Then, cut the wires as short as you can safely manage, about iii" (because you'll have to stuff them all into the central hub, so you don't desire whatever actress…but not too short, either!), then remove the individual wire casings and twist together. (Note: Push button a black and white wire through the vertical ceiling-connecting pipe, then remove that single black wire casing terminate then y'all're gear up to adhere it to the branches' black wire cluster.)
 View in gallery
 Footstep 10a: Adhere single blackness wire to cluster. Twist the unmarried blackness wire into to the cluster of black wires from the branches. And then, using a wire nut, screw them all together deeply.
 View in gallery
 Step 10b: Secure connection with electrical tape, then push blackness wires and wire nut into cardinal hub. Exist careful not to sharply bend/break the wires. This is tricky, take your time.
 View in gallery
 Tip: Considering y'all will exist screwing the vertical pipage section of the fundamental hub onto the lower portion of the primal hub, and considering you don't have one square millimeter to spare, take a moment here to counter-twist your vertical pipage. With the single black and white wires already coming through your vertical pipe, and the single black wire already connected, grasp the end of the single white wire and twist the vertical pipage section counter-clockwise (the management you would utilise if you were unscrewing the hub). Your wires volition twist here, which is what you want because when you lot spiral the central hub back together, that will untwist the wires.
Footstep 10c: Adhere white wire cluster with single white wire. But like yous did for the black wires, you'll now remove white wire casings, twist ends together, attach wire nut, put on electrical record, and carefully fit everything into central hub. Screw the hub together. (This is not easy, but information technology is achievable.)
 View in gallery
 Step 11: Cover last hole on central hub. Using the reducer and plug pieces, cover up the last hole on your central hub.
 View in gallery
 Step 12: Notice the ceiling awning and slide information technology onto the vertical pipe.
 View in gallery
 Stride 13: Spiral vertical pipe into ceiling mount. Exist careful to not let the branches hit your face up as you screw the chandelier in! Have your fourth dimension, use a second set of hands if necessary.
 View in gallery
 Step 14: Wire chandelier to existing calorie-free wiring in ceiling.
 View in gallery
 Step 15: Exam it out. Flip the billow switch to return power, and so cross your fingers and turn on your chandelier. Hopefully information technology works like a amuse! You're so shut to being done.
 View in gallery
 Step 16: Attach ceiling awning. I'd recommend flipping the breaker switch to turn electrical off here, then adhere the ceiling canopy earlier turning the electrical back on.
 View in gallery
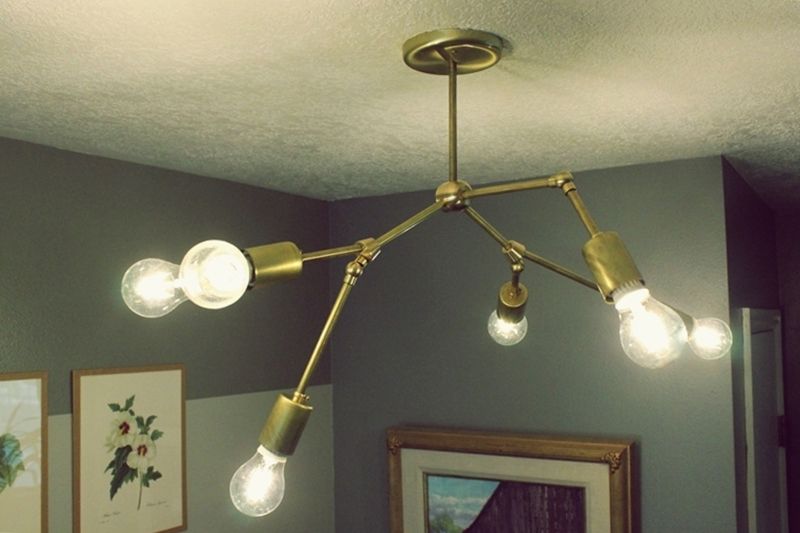
 Step 17: Pat yourself on the back for a job well done. Savor your new chandelier and the many trips yous're about to make into your space but to admire information technology.
We promise y'all find this tutorial helpful and that y'all find success in creating your own beautiful contumely chandelier!
Source: https://www.homedit.com/diy-brass-chandelier/
0 Response to "DIY Brass Chandelier"
Post a Comment